Sunday, July 13, 2014

Beans, beans, the musical fruit : )

Beans are praised as a source of lean protein, iron, and fiber. With so many types of beans available the possibilities are endless...soups, salsas, dips, and even burgers. So join me this Sunday evening with a meatless meal that is loaded with nutrients and oh so flavorful!


Black Bean Patties
3 tablespoon olive oil, divided
1 small yellow onion, diced
1 large clove garlic, diced
1 small poblano chile pepper, stemmed, seeded, and diced
2 teaspoon ground cumin
teaspoon smoked paprika
1 chipotle chile in adobo sauce, diced
1/2  cup whole wheat breadcrumbs, plus extra for dusting
1 egg, lightly beaten
1 (15-oz.) can black beans, rinsed, drained, and pureed (use immersion blender or mini chopper)
salt and freshly ground black pepper, to taste

Avocado Yogurt Sauce
½ cup non-fat Greek yogurt
2 tablespoons freshly squeezed lime juice
1 avocado halved, pitted, and peeled
salt to taste

Heat 1 tablespoon olive oil in a large skillet over medium heat. Add onions and saute until soft, about 4 minutes. Add poblano pepper and saute until soft, about 4 minutes. Then add garlic and saute an additional 1 minute. Add cumin, paprika, and chipotle chile and saute until fragrant, about 1 minute more. 


Transfer to a bowl and allow to cool, about 5-7 minutes. Mix in breadcrumbs, pureed beans, and egg. Season with salt and pepper to taste. Mix well to combine. 


Divide mixture evenly into 4  sections. With wet hands form patties about 3" wide x 1/2" thick. Dredge patties in breadcrumbs and place on a plate. Cover and refrigerate for at least 30 minutes or until ready to use.


Meanwhile prepare the Avocado Yogurt Sauce- 
Combine Greek yogurt, lime juice, avocado in a blender or mini food processor. Puree until smooth and season with salt to taste. Transfer to a covered bowl and store in the refrigerator until ready to use.

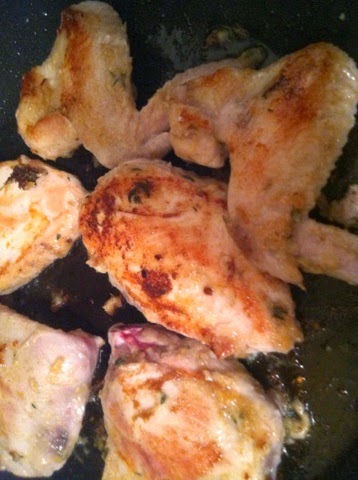
Heat remaining 2 tablespoon olive oil in a large skillet over a medium heat. Saute patties, flipping once, until lightly browned on each side and cooked through, about 5 minutes. 

Top patties with Avocado Yogurt Sauce and enjoy with a friend...

Saturday, May 10, 2014

Ranch Chicken Burgers


I recently found myself asking a package of ground chicken sitting in my fridge, "No offense, but how can I make you a tasty?!?"

Ground chicken has a lot going for it, such as its heart healthy nutrient profile- it's a lean protein, low in calories, saturated fat, and sodium per serving. This makes it a great choice to add to your dinner plate! Since it is a lean protein, it needs extra love and attention to avoid a dry finished product. So after some rummaging through my cabinets and a quick run to the grocery store, a Ranch Chicken Burger was created!

The diced mushrooms add extra veggies and a bit of texture, while the whole wheat bread crumbs help this lean meat hold its shape and adds a bit of fiber too!

Ingredients:

1 pound ground chicken
1/2 cup minced mushrooms
1/2 cup whole wheat bread crumbs
3 tablespoons Homemade Ranch Seasoning (see below for recipe)
Canola oil
Swiss cheese, sliced
Good quality bread or buns- I used a semolina loaf, sliced 3/4" thick
Mayonnaise
Lettuce, sliced tomatoes, and onion

Homemade Ranch Seasoning-

  • 1/4 cup dried buttermilk powder
  • 1 1/2 teaspoon dried parsley
  • 1 teaspoon onion powder
  • 1/2 teaspoon garlic powder
  • 1/2 teaspoon dried dill
  • 1/2 teaspoon dried chives
  • 1/2 teaspoon salt
  • 1/4 teaspoon freshly ground black pepper
Note: the above mixture is more than needed for this recipe, so store the excess in a plastic bag or small mason jar.

Directions:

Preheat oven to 400 degrees.

Mix ground chicken, minced mushrooms, bread crumbs, and 3 tablespoons of Ranch seasoning together in a large bowl. Form into patties- 3" diameter and 1/2" thick. This recipe yields approximately 5 patties, each equaling 4.15 oz each.

Heat canola oil in a large saute pan over medium heat. Once oil is shimmering, add chicken patties. Be careful not to overcrowd pan; you may need to cook in two batches.

Saute about 3 minutes per side, or until golden brown. Due to leanness of meat, it is important not to overcook to prevent dryness.

In the meantime, place bread slices on a cookie sheet and lightly toast in oven a couple minutes per side.

Once burgers are finished cooking, remove from pan and place a cheese slices on top. Remove bread from oven and spread with mayonnaise. Now the fun part...begin assembling your nutritious and delicious masterpiece! Enjoy : )


Tuesday, March 25, 2014

Garlic Marinated Chicken with Israeli Couscous

This dish is a combination of some of my favorite herbs and spices...cumin, red pepper, thyme, and garlic. You can get creative with the ingredients by adding additional vegetables like summer squash or eggplant. You can keep this dish heart healthy by removing as much of the chicken's skin as possible before marinating. This step will decrease the total amount of saturated fat, which your heart will thank you for! Lastly, make sure to use Israeli (aka- Pearl) couscous; the balls of semolina are larger than traditional couscous and add a nutty, chewy texture to eat bite. 


Ingredients- 

Marinade:
2 whole garlic bulbs
1 lemon, zested and juiced
1 tablespoons fresh thyme leaves
1 tablespoon cumin
1/2 teaspoon crushed red pepper flakes
Salt, to taste
3 tablespoons extra-virgin olive oil

1 whole chicken, about 3 lb total, 
cut up into 8 pieces (you can do this yourself or buy one pre-cut)

2 cups Israeli or Pearl couscous

Sauce:
2 tablespoons extra-virgin olive oil
1 large onion, peeled and sliced
1/2 teaspoon crushed red pepper flakes
1 1/2 cups dry white wine
3 tablespoons tomato paste
2 zucchini, cut into 1-inch dice
2-3 cups chicken stock

Garnish:
3 scallions, white and green parts, thinly sliced

Directions-

Marinade:
Preheat the oven to 375 degrees F. Wrap garlic bulbs in tinfoil and roast until soft when squeezed, about 30 minutes. Let cool about 25 minutes.

Once garlic bulbs are cool, slice tops off and squeeze out roasted garlic. Add the garlic to a food processor or a bowl, along with the lemon zest, lemon juice, thyme leaves, cumin, crushed red pepper and salt, to taste. Add olive oil and puree or mash into a loose paste. Remove skins from chicken and massage the mixture over chicken pieces. Let marinate in refrigerator for at least 1 hour.


Meanwhile, bring a pot of well salted water to a boil. Add the couscous and boil until half-way cooked, about 3-4 minutes. Drain and reserve.


Remove chicken from refrigerator and season with salt and pepper. Coat a large sauté pan with olive oil and heat to medium-high. Once oil is hot, add chicken to pan and brown on both sides, about 4-5 minutes per side. 


Sauce:
Remove browned chicken to a plate, decrease heat to medium and add the sliced onions. Sauté until onions are soft, about 3 minutes. Add crushed red pepper and continue to sauté an additional 1 minute. Add the white wine (deglaze), scraping up all the brown bits (fond) on the bottom of the pan and simmer onions about 5-7 minutes. 


Stir in the tomato paste and cook for another 2 minutes. Add zucchini, par-cooked couscous, and chicken stock. Stir to combine, then taste and adjust seasoning as needed. 


Transfer the mix to 9x13 baking dish, making sure the chicken is nestled in the couscous. Cover with foil and place on a sheet pan.

Transfer pan to preheated oven and roast for 20 minutes, covered, then remove the foil and roast for another 10-15 minutes.

Garnish with scallions before serving.


Enjoy!

Wednesday, January 15, 2014

Lemon Yogurt Cake


When I think of lemon cake, I think of a warm hug right out of the oven. Sounds strange, I know, but I think all you foodies out there might be able to relate. Sporadically throughout the year, I find myself craving a moist lemony cake…usually when I am in need of a hug, but no one is around at the moment for me to grab. This can be a hug needed either for celebratory reasons or a hug for comfort. Either way, lemon cake usually does the trick and I feel better in no time! It starts in the kitchen, where most of my happy times begin and ends with me biting into a little slice of lemon-heaven.

This is one of my favorite lemon cake recipes (and I've tried a lot of them)! I have adapted this recipe to be lower in fat and sugar than its original version and the final product remains moist, tender, and full of lemony goodness! One of my favorite aspects of this cake is that it is moistened with non-fat plain Greek yogurt.  It adds a hint of twang only yogurt can give and ensures a moist crumb without the added fat of butter.

Hope your lemon hug is a happy one : ) 

Lemon Yogurt Cake

 Cake Ingredients-

1 ½ cups all-purpose flour
2 teaspoons baking powder
Pinch of salt
1 lemon, zested and juiced (one lemon usually yields about 3 tablespoons of fresh lemon juice)
½ cup non-fat plain Greek yogurt
½ cup sugar
2 eggs
½ cup canola oil

Icing Ingredients-

¾ cup powdered sugar
2 tablespoons fresh lemon juice

Preheat oven to 350 degrees. Grease a 9” round cake pan with cooking spray.

In a medium bowl, whisk together flour, baking powder, salt, and lemon zest.

In a large bowl, combine yogurt, sugar, eggs, oil, an 1 tablespoon fresh lemon juice. Whisk to mix thoroughly.

Add the flour mixture to the wet ingredients and mix to combine. Once it comes together into a smooth, pale yellow batter, pour into prepared pan.

Bake 20 minutes or until toothpick inserted in center comes out clean. It is important NOT to over bake, as it will decrease the cake’s moistness.


(This part requires patience, so get a book or make a phone call to your mom)- Cool cake in the pan on a wire rack for 7-10 minutes. Run a knife around the edge of the pan and invert cake onto the cooling rack and allow to cool an addition 7-10 minutes.

Meanwhile, in a small bowl combine icing ingredients and whisk well to dissolve all sugar completely. Place the cake on plate and spoon icing over the top. Allow icing to drip down the sides to create a decorative pattern. Serve immediately to enjoy warm.


Note- This cake lasts beautifully for two days. It's even better the second day, as it's moistness only increases. If you don’t think you can eat it all in two days, then I recommend slicing off what you don’t think you will eat and freezing it for a later date. 

Saturday, January 4, 2014

Prosciutto and Goat Cheese Chicken Rollatini

This recipe found its way into my kitchen years ago and over time has transformed into a beautiful marriage of prosciutto and goat cheese. The pan sauce that coats each rollatini is finished with a pat of butter to create a silky smooth texture. I often pull this dish out of my recipe box for both large crowds, as well as intimate dinners. Not only is it delicious, but can also be created with ease.

My favorite sides for this dish include roasted garlic broccoli and a fresh whole wheat baguette to sop up the juices! Oh, and don’t forget to pour yourself and your special someone the rest of the wine not used for cooking! 


Prosciutto and Goat Cheese Chicken Rollatini

3 boneless, skinless chicken breasts
12 tablespoons goat cheese, softened
6 slices prosciutto
3 tablespoons butter, divided
10 oz mushrooms, sliced
Flour, for dredging
2 tablespoons canola oil
1½ cups chicken broth
¼ cup or your favorite red wine (I used Beaujolais)
Salt and black pepper, to taste

1.       Fillet chicken breast- Lay chicken breast onto a cutting surface. Make sure the thicker end of the meat faces the knife hand. Flatten the meat with the other hand and begin cutting horizontally through the midsection of the breast.  Watch your fingers!

2.      Take the 6 filleted chicken breasts and pound them to 1/8th of an inch thick.

3.       Place chicken breasts on a flat surface and working one by one- spread with 2 tablespoons of goat cheese and top with one slice prosciutto. Roll into a tight cylinder. Using kitchen twine, tie chicken roll 1" in from each end. Snip off excess twine. 

4.      Heat 2 tablespoons of butter in a large sauté pan over medium-high heat. Add mushrooms and cook 5-6 minutes, until tender and browned. Transfer mushrooms to a plate and wipe out skillet.

5.       Pour flour on a plate and season with salt and pepper. Dredge each chicken rollatini in the seasoned flour. In the same sauté pan that was used for the mushrooms, add oil and heat to medium. Once oil is shimmering, add chicken and cook, turning, until browned on all sides and cooked through, 13–15 minutes.

6.      Transfer chicken rollatinis to a plate. Add broth and wine to sauté pan and increase heat to high. Boil, stirring often, until sauce has reduced by a half, 4–5 minutes. Return mushrooms and chicken to pan and cook, gently turning rollatinis to coat in sauce, about 5 minutes. 

7.       Transfer chicken to a platter. Remove skillet from heat and swirl in remaining 1 tablespoon of butter to create a silky pan sauce. Season with salt and pepper to taste. Spoon sauce and mushrooms over chicken and serve with your favorite sides. 

Tuesday, December 10, 2013

Strawberry Santa's


"Merry Christmas!" 
from a very nutritious and delicious Santa Clause!!


I was recently asked to conduct a cooking demonstration for a health fair where I showed employees how to make easy, creative, and healthy holiday treats that did not involve an oven. This cute strawberry Santa was a big hit with my crowd of viewers. Not only is it a yummy treat for the holidays, but it is sure to delight the palates of both children and adults alike!

Strawberry Santa Recipe

20-25 fresh strawberries
1 cup part skim ricotta cheese*
1/4 cup powdered sugar
1/2 tsp vanilla
40 mini chocolate chips

Rinse strawberries in a colander and allow to dry for several minutes.
Slice off the green stem to create a flat surface, then slice the strawberry in half.
In a small bowl, mix together ricotta cheese, powdered sugar, and vanilla. Spoon filling onto the strawberry's bottom slice and place on the top slice to create a Santa's hat. Add a small dab of filling on the top of the strawberry hat. Position 2 mini chocolate chips in the center of the cheese filling for eyes. Enjoy!

*Variation- if you are not a fan of ricotta cheese, use whipped cream cheese instead. Still not a fan...? Use cool whip, but don't add the powdered sugar.

Monday, October 14, 2013

Spaghetti Bird's Nest

As I was grocery shopping yesterday, I came across mini mozzarella balls (Bambini Bocconcini). They reminded me of bird eggs and inspired  this dish. What a fun night in the kitchen! I wished I had my niece and nephew there helping me. I even snuck in some veggies, disguised as tree leaves : ) 

Hope you have as much fun as I did creating a delicious work of art. Mangia!! 

Spaghetti Bird's Nest
(yields 4 nests)
Pasta Ingredients:
1/2 box spaghetti
3 packed cups fresh spinach leaves, finely chopped
1/4 cup grated Parmesan
2 tablespoons extra virgin olive oil

1/2 teaspoon salt

Assembly Ingredients:
1/4 cup grated Parmesan
2 tablespoons milk
1/2 teaspoon salt
1 large egg
extra virgin olive oil (for drizzling)

Plating Ingredients:
2 cups pasta sauce
12 small fresh mini mozzarella balls
homemade mini meatballs (optional)


Directions: 
Preheat oven to 350 degrees F. Line mini bunt pans or large muffin tins (4” diameter) with aluminum foil and grease with olive oil.

Bring a large pot of salted water to a boil. Add pasta and cook until aldente, stirring occasionally, 8 to 10 minutes. Drain the pasta and place in a large bowl. Add the chopped spinach, cheese, olive oil and salt. Toss well until the spinach is wilted. Set aside to cool.

Whisk together Parmesan cheese, milk, salt and egg in a small bowl. Pour the sauce over the spaghetti mixture and toss until well combined. Twirl large spoonfuls (about 1/2 cup) of the spaghetti mixture around a large fork or thongs and transfer to the prepared pans. Make an indentation in the middle of each nest of pasta and drizzle with olive oil. Bake 15 minutes. Let cool 5 minutes, remove from pan and gently take off aluminum foil.

Spoon 1/2 cup of the pasta sauce onto serving plates and place the spaghetti nests on the sauce. Place 3 mozzarella balls in each nest. Optional side- mini meatballs. 


They are almost too cute to eat!!